Angle Plate
Tuesday 20 Jan 2004
Way back in 2000 I purchased some bits of steel for future tooling. I got 2 disks of 32mm plate
and a piece of 120x120mm long angle iron, 120mm long, with the idea of making an angle plate
'sometime in the future'. That time arrived slowly. I welded in the webs in 2001, sent it for
machining on a friends mill in 2002, and got it back in 2003. In December 2003 I started
making another tool holder for a friends lathe and need, obviously, to mill the tool slot.
So I thought I'd finish the angle plate to make that 'easier'.
hah!
Well, I worked at it off an on up till the 10th of January 2003, on which day I awoke with pain in my left jaw joint. It wasn't too bad, so I just carried on and spent most of the day drilling and tapping all those holes. The next day the swelling was big and painful, and the doctor diagnosed MUMPS. By this time running a fever, I could not continue, even though I've now been stuck at home since then (till now, and prob till Thursday as the swelling goes down). Being at home but unable to play in the workshop is the pits.
And so to the pictures....
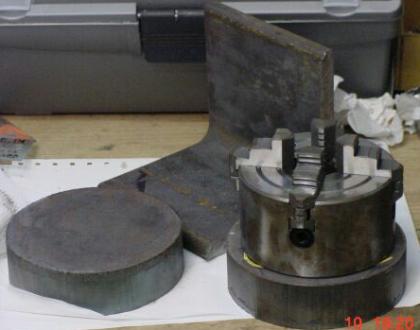
An old shot of the raw angle plate as I received it. I simply ordered
a 120mm section of 120x120mm angle iron. Cheap and efffective.
Other items are the raw disks I subsequently used to make a backing plate
for the 4 jaw chuck, and a rough and ready fly cutter. They are flame cut
32mm plate.
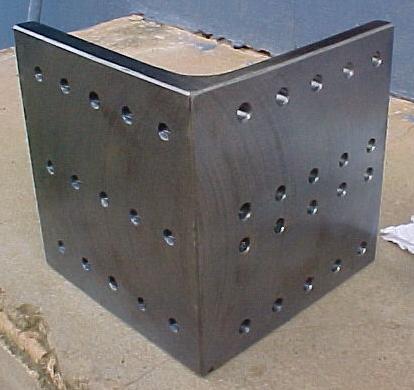
Machined faces of the angleplate showing the hole patterns. Left hand
pattern is drilled and tapped M6, to match the base of the topslide
mounting. This is so that I can bolt the topslide to the angleplate using
M6 bolts. The other face has plain 6mm holes. The pattern matches the
crosslide T-slot spacing in both directions to provide for versatile
positioning on the crosslide.
Of course, I can drill and tap custom holes as needed.

The rear face of the angleplate showing the welded in braces. Not my best welding, and it looks like I'll need to make a counter bore bit to clean up some of the weldment to enable nuts to sit flat against the face when fastening things to the faces.
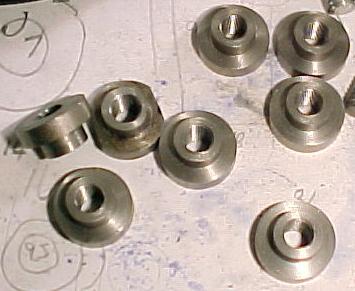
The T-nuts I ran off with one (2nd from left) of the first 2 I made among them. The nuts are tapped M6 after turning the step and parting off, and have yet to have the flats filed so they fit the Myford T-slots. Work on these items was interrupted by a dose of mumps which has kept me low for nearly 2 weeks.
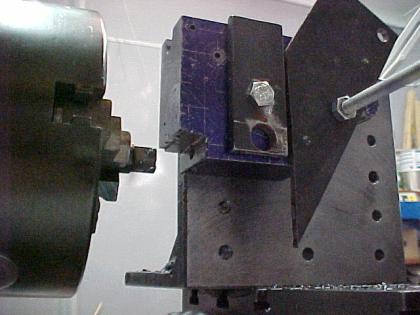
The first cut made using the angleplate. This notch was cut at about 30 thou per pass with my homemade endmill. No chatter, no problems. Smooth finish.
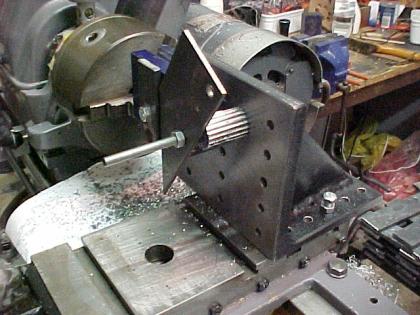
A general view of the angle plate mounted on the crossslide. I first tried just the one bolt through the workpiece but it moved, so I added the rear plate which is standing on the chunk I chain drilled out of the block so it is convenienctly the same height. Why did I chain drill it out? I though it might be quicker than drilling and boring the 30mm hole, but it wasn't really. Also, I laid out the chain circle too small, it could have been bigger which would have been much better. For an experiment it went off well though, as it worked exactly as anticipated.

Rear view of angle plate mounting. I've used 3 M6 bolts to hold it down to the Tnuts in the Tslots of the crossslide. Very rigid like this, and I'm pleased with my hole layout that allows a choice of positions every 'half the slot spacing' apart.
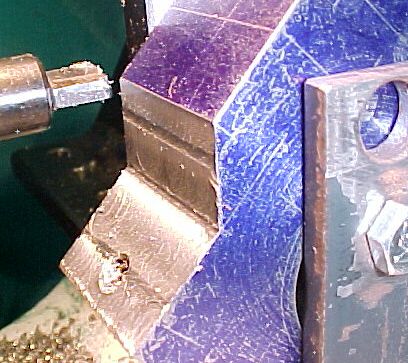
The final cut on the toolblock. Just a tad too deep though! Cutting to full depth with this rig is a bit slow so I hacksawed off most of it after doing the first fulldepth cut. Cleaning up after the hacksawing was a doddle, and is much faster than otherwise.
Fine feed was achieved by this cunning plan.
Random Quote
God is with thee in all that thou doestLast modified: April 25 2026 16:56:36.